Imagine it’s time to go to school. Do you need to put on your coat? Have you got your school bag? Is it big and heavy?
We leave the house and close the door. What can you see on the street? Are there lots of cars and people? What can you hear? Are there birds singing?
What’s the weather like today? Is it cold and windy? Is it raining? Do you need to put up your umbrella? Or is it a beautiful sunny day?
Do you walk to school? Do you take a bus? Do you go by car? Do you ride your bike?
Think about the trip you take to school. What do you see? Are there lots of shops? Do you walk past a bread shop and smell delicious, hot bread? Do you go past lots of houses? What do they look like? Do you see lots of people? What are they doing?
What do you do when you get to school? Do you play with your friends? Do you go into class? What’s your favourite thing about going to school?
Como muchos estamos hoy en día encerrados por el COVID-19, es un muy buen momento para utilizar la visualización con nuestros hijos y alumnos – algo que pueden hacer en cualquier sitio, tranquilos y con los ojos cerrados. Si no has hecho antes una visualización, aquí os dejo tres consejos:
Hablar lentamente, dejando una pausa entre frases para pensar y visualizar
Utilizar un vocabulario sencillo para no distraer
Incluir todos los sentidos que puedes para hacer una experiencia más profundo
Aquí hay un idea para una visualización con los más pequeños.
Imagina que estás en el parque. ¿Con quién fuiste? ¿Con tu madre? ¿Con tu padre? ¿Con los abuelos?
Cuando entras en el parque, ¿que ves? ¿Hay muchos arboles? ¿Hay un espacio donde puedes correr?
¿Qué puedes hacer en el parque? ¿Puedes jugar al futbol? ¿Puedes escalar? ¿Puedes correr rápido?
Imagina que te sientas. ¿Te sientas al suelo? ¿Cómo es? ¿Hay cespéd? ¿Hay arena?
¿Cómo es el tiempo donde estás? ¿Hace sol y calor? ¿O hace frío? ¿Qué llevas puesto? ¿Una camiseta y los pantalones cortos? ¿O un abrigo? Mira los pies. ¿De qué color son tus zapatos hoy?
¿Qué puedes oír en el parque? ¿Hay otros niños jugando? ¿El parque está al lado de una avenida con muchos coches, o está en una zona tranquila?
Has pasado un buen rato jugando en el parque y ahora toca ir a casa. ¿Cómo te sientes? ¿Cansado? ¿Tienes sed y ganas de un gran vaso de zumo? ¿Tienes hambre después de correr tanto?
Now more than ever, it seems like a good time to get our students to close their eyes and visualise the wider world. If you’re new to visualisations, here are three quick tips before you start:
Speak slowly and calmly, pausing to give students time to think between each phrase.
Grade your language so that they aren’t distracted by unknown vocabulary.
Try to include as many senses as you can.
Here’s an idea for a visualisation with younger learners about playing in the park.
Imagine you’re in the park. Who did you go with? With your mum? Your dad? Your grandparents?
When you walk into the park, what can you see? Are there lots of trees? Is there a big area to play in?
What can you do in the park? Can you play football? Can you climb? Can you run around really fast?
Imagine you sit down in the park. Are you sitting on the ground? What does it feel like? Is there grass? Are there stones?
What’s the weather like in the park you’re in? Is it a hot and sunny day? Or is it cold? What clothes are you wearing? Shorts and a T-shirt? Are you wearing a coat? Look down. What colour are your shoes?
What can you hear in the park? Are there other children playing? Is the park next to the road or is it very quiet?
You spend lots of time playing in the park and now it’s time to go home. How do you feel? Are you tired? Thirsty and ready for a big glass of juice? Are you hungry after running lots?
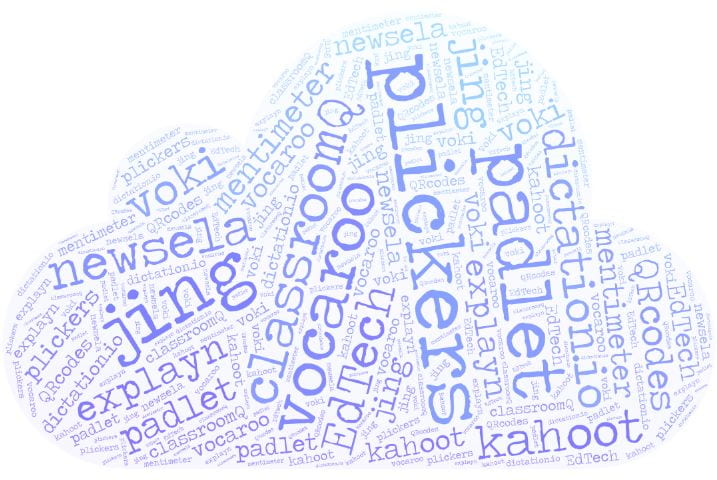
Welcome to my session on using EdTech in the ELT classroom.
In all my excitement and nerves on Saturday, I forgot to highlight some of the pros and cons of the different tech and also to provide non-techy alternatives. I’ve added some more notes below. Thanks for coming 🙂
You can sign up for a free account which allows you to prep sets with up to five questions in each. You’ll need to download the app to your phone as well. The cards are free to download and if you laminate them, remember to use non-glossy sheets. If there are any privacy concerns in your school, you can ask students to hold the cards in front of their faces although the app doesn’t actually record images.
One thing which I didn’t mention in the session is that you can assign each student a specific card as they’re all numbered. This means you can track their progress if you decide to use them for assessment. It also means that you can easily identify who in the class you haven’t scanned – I know I didn’t scan everybody all the time on Saturday!
A non-techy alternative? Have students put their hands up, although a benefit of Plickers is that it gets responses from everyone at the same time and it’s difficult to see which option the person next to you has chosen.
This is a handy way to share online content with your students rather than having them type in the URL. It does require students to have a QR code reader on their phones though. If you’re looking for another way to easily share URLs with students, you can use a site like bitly which enables you to shorten a URL.
To be honest, there’s not really a non-techy alternative to this as it’s for sharing online content and one aspect where I think it’s useful, as I mentioned in the talk, is for doing reading activities paper-free. Go #ELTfootprint!
Dictation.io– for both dictation to text and text to speech
As I said at the weekend, I thought this could be a useful tool for students to work on their own pronunciation as they could dictate a phrase and then see if there were any sounds which they’d said incorrectly. However, voice recognition software is still in development: there are times when it’s too forgiving and times when it’s frustratingly stubborn.
We’ve been doing dictation in class for years so the non-techy alternative is easy enough. However, one way that the online tool can be useful is in ensuring your students aren’t dictating ‘in Spanish’ to make the words easier to understand for their partner (I e-at to-ast for bre-ak-fast).
This can be a fun tool to use for pronunciation diagnostics at the beginning of a course, particularly if you’re teaching multilingual classes. It’s also a good way to ensure that you hear all your students speaking – even in a class of eight or ten, you won’t hear all the students, all the time and so having them record a short mono- or dialogue means you can provide feedback on the task each one does.
You need to check your school’s policy on allowing students to connect with you digitally for this one, as they would need to share the audio with you (similarly for the dictation site above they can email you their completed text if you wish). And, it does mean that you’re making a bit of extra work for yourself outside the classroom to listen to each track and provide feedback on it.
A couple of people mentioned to me in the session a similar site called voki, which students can use to create mini animations, either with a bot reading the text or their own recording. Speaking of which, check out the link to Voicery at the bottom of the page to see if you can distinguish between a human and a bot speaking.
Jing– for providing audio feedback on written work (download required)
If you want to go à la Chris Roland and allow your students multiple drafts before submitting a final piece of writing, this is a very tree-friendly tool to use. Students can send you through their text digitally and using Jing you can make a screencast and record audio as you provide feedback on the text. Then share the video with the student and it provides them with listening practice as well as the opportunity to self-correct their mistakes.
Non-techy alternative? Grab your pencil and get correcting 🙂
It’s also handy for providing students with instructions if you want them to do something online. Students are much more likely to use and continue using an online language-learning tool if we provide them with clear instructions on how to do it, rather than giving them the URL and expecting them to intuitively know how to use the site.
To use Jing, you need a computer as the tech currently isn’t available on mobile devices and keep an eye out for whatever TechSmith are replacing Jing with early next year – they say it’s going to be better and still free to use.
For those of you who have used Kahoot in the past, Mentimeter is very similar. However, with Kahoot’s growing popularity, a number of features are now only available in the pay-for-use version, whereas Mentimeter is still all free and there’s a lot you can do with it (and without the annoying music).
Students will need to have their devices in order to participate and also be aware that when you create a presentation, the code is only valid for two days so double-check the code on the day of your lesson so that students can easily access it.
Newsela – for graded news articles (sign-up required for both teacher and students)
This is an example of a site which you might like your students to access outside the classroom. Teachers and students need to sign up for an account; this then allows you to assign texts to your class and supposedly tracks the progress of your students in order to grade the text to their level as they become stronger readers.
In the free version, there’s access to recent US news articles and if you choose to pay for further access there are articles on lots of diverse topics.
One thing I was less convinced by on the site was the quiz which goes with the article – they seemed poorly-written and linguistically challenging.
In terms of providing a non-techy alternative, the best I could come up with for this would be for the teacher to produce their own graded texts – which is very time-consuming.
Also, one thing to add about this is that the texts are graded 1-6 but these don’t necessarily coincide with the CEFR and so there might be higher-level lexis and structures in a text than you would expect.
This has its pros and cons as it does encourage students to listen to the video carefully and means they can’t really be misusing their devices at the same time. However, at the same time it makes the video-viewing a little disjointed. One option would be to watch the video all the way trhough first and then watch it again through Fluentkey.
Explayn – for revising vocabulary (enter code 213343)
The tech alternative to a vocab box. On the plus side, it’s an engaging way for students to review lexis and wouldn’t be distracting in terms of mobile phone use as only one person in the group needs to have their phone out and once you’ve played the game, the phone goes away again. It looks as though you can have up to three sets, though with as many words as you like in each. As we said in the session, an option could be to have a class member responsible for creating a set at the end of each unit.
ClassroomQ – for asking questions (enter code QE6JC1)
As I said on Saturday, I feel the original concept of this site was developed for classroom environments different to what we’re used to as ELT teachers in Andalucía: large classes in which each student has a device is very different from my experience of working with groups of eight sudents sitting around the table. So, for use as a classroom management tool, I feel it’s less pertinent. However, I love the way it can be used in quizzes for the teacher to easily see who got the answer right first. With the free version, you can only see the first five people on the list; however, as you clear people who get the wrong answer, the next in line will pop up.
A tech-free alternative would be to have students write their answers on mini-whiteboards and then to get around the problem of who’s who in order, have them run to the board and stand in a line while you check their responses.
A tree-friendly alternative to using post-it notes or some other physical exit note. It’s an easy way for students to share either what they’ve learnt or enjoyed from the lesson and could also be a useful way for students to reflect on things like emergent language: when you have a list of twenty-odd words at the end of the lesson, have each student identify which are the three most useful for them OR divide the words between the students and have them post a definition of each one on the message board.
Thanks again for coming to the session
…and I hope you enjoy trying out the tech you found interesting in your lessons. All the sites I showcased required minimal prep – Mentimeter would probably be the most time-consuming but you can use it to make presentations to use more than once, the same way you might plan a lesson for two or three groups and tweak it accordingly. However, I do think the quote from Steve Wheeler below is particularly important and really believe that we shouldn’t include tech just for the sake of it.
Further reading
“…we should only use technology in the classroom if it adds something to learning. If it can extend, enrich or enhance learning, or if it engages students more, then use it. If not, ditch it and try something else. Seriously.” Check out Steve Wheeler’s Twisted Tropes
Thanks to everyone who came to my session at Innovate on Saturday. I’m currently in the process of working out how I can share the story with the audio as part of it. I realised after doing the session that obviously the audio wasn’t working because it wasn’t saved on my pendrive – I did warn you all I’m not particularly techy!
Anyway, a quick recap of some of the tips and thoughts from the session:
* You can download the Plickers app on your phone and get the cards here. As I mentioned, it’s better to cut the cards a little bigger than I had them as it’s important the whole square of the QR code can be seen when scanning. If you decide to assign each student a card, you can set up class groups – this means as well that you can use one set of cards across multiple groups. I’d definitely laminate them and the site recommends using non-glossy laminating sheets so there’s less reflective glare when scanning.
* Here’s a very quick video of how to insert action buttons into a Powerpoint in case you want to make a similar story (if you do, I’d love to see it!). This was created using Jing – great for when you want to make videos of what’s happening on your screen.
* I’m going to (hopefully!) upload two versions of the story – one with the productive speaking element and the other without. As I said in the session, I wasn’t sure whether the questions broke up the flow of the story too much.