February 27

Spot the difference

A couple of weeks ago, I was at the FECEI conference in Madrid and held a workshop called Engaging Exam Exercises.  The first activity we practised was a picture description with a twist.  I started doing this activity in my class for two reasons:

  1. to give learners a reason to listen to their partner’s description, which is a great opportunity for them to pick up new lexis and structures from peers
  2. to provide a model in the early stages so that learners were able to describe a picture well for a minute, without becoming repetitive

Tell learners to close their eyes and describe a picture to them, but make some changes.  If you check out the slides in this post, see if you can spot the differences with the first picture.

I can see a girl who looks about 50. She’s wearing a black, long sleeved T-shirt and she’s got short, brown hair. She looks really happy and she’s holding a piece of paper that says, “4 intense weeks”. She’s in a building and I can see a plant behind her. There are also some pictures on the wall next to the plant and to the right there’s a big window. It’s daytime and it’s a really sunny day – you can see the sun coming in through the windows. I imagine she’s in a house and that she’s having a good time.

After you’ve modelled the task, put learners into pairs, A and B. A closes their eyes whilst B describes a picture; then A looks at the picture and tells B about the differences. In the next slide, you can see a model of the task with the sentence stems to help learners and on the third slide, instead of stems, there are the questions they should think about when describing the picture – giving them more autonomy and removing some of the scaffolding.

Category: Uncategorized | 2 Comments on Spot the difference
March 4

Picture Dictations

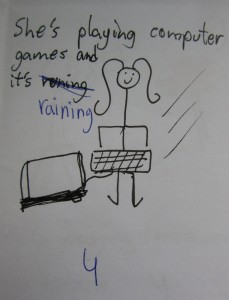
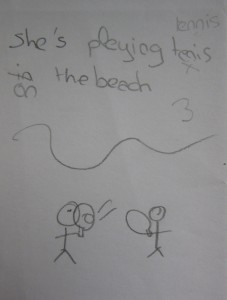
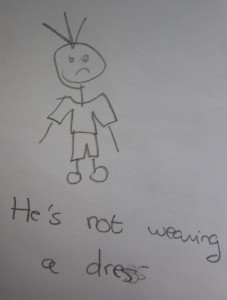
I had a great time the other day with my 11-year-olds as we were practising the present simple through picture dictations.  One thing I particularly enjoy about running picture dictations with Spanish speakers is that it removes their desire to dictate “phonetically” – in a normal running dictation, learners are obviously keen to get the spelling correct and so end up dictating things like, “The to-ast is very de-li-ci-ous” or “I li-ke waa-ching TV”.

IMG_2650A quick stage guide:

  1. Introduce and model the activity with a learner.
  2. Pair learners up and give instructions.
  3. Learners work on running dictation in pairs.
  4. When they have all the pictures, instruct them to work together to write a sentence (remind them to use the present continuous).
  5. Swap papers with another pair to correct. Elicit sentences from learners, write correct sentences on the board.

I told the groups there were a maximum of five points per sentence and that they should take off a mark for each mistake (hence the numbers on some of the pictures).

IMG_2644IMG_2651

November 2

Introducing new lexis with YLs

Introducing new vocabulary can often be a tedious, rote-learning affair: the teacher holds up a flashcard, elicits what it shows, models the correct pronunciation, the learners repeat and we move on to the next word. Whilst this is an effective way of exposing our learners to single words, we can do so much more to engage them and make the process of assimilating new lexis much more enjoyable.

Take for example, the flashcard below from Macmillan, “ball”. This may be as much as we want our learners to take from the flashcard, but with a little encouragement we can build them to saying, “It’s a big, orange and green ball” and more!

So how can we build this sentence with our young learners? It happens something like this:
Teacher (holding up flashcard): What’s this?
Learners: Ball
Teacher: It’s a ball. (mimes for learners to repeat)
Learners: It’s a ball.
Teacher (whispering): It’s a ball.
Learners (whispering): It’s a ball.
Teacher (shouting): It’s a ball.
Learners (shouting): It’s a ball.
Teacher: Is it big or small? (with appropriate hand gestures)
Learners: Big.
Teacher: It’s a big ball. (gestures for learners to repeat – and again the process of drilling with different voices: whispering, shouting, slowly, faster, with a robotic voice, with a squeaky voice)
Teacher: What colour is it?
Learners: Orange and green.
Teacher: It’s a big, orange and green ball. (and again the teacher drills the sentence in a number of different voices, both chorally and individually)

We’ve now moved learners away from a single word to a full sentence, using correct adjective order and grammatical structure. As learners become accustomed to this style of introducing new lexis, they begin responding more fully when asked and within a short time will automatically respond with “It’s a…”

But this style of lexical exposure can still be dull for our learners – and this is where a little imagination can have a very positive role.

It’s a sandwich. But what’s in it? Elicit tomato and lettuce and drill, “It’s a tomato and lettuce sandwich”. Then ask them if there are spiders in the sandwich – after an initial, “no! Urgh!”, someone’s bound to shout “Yes!” Then they can come up with their own ideas – anything goes if it’s in a full sentence. What’s important is that they’re repeating the core lexis – by the end of the lesson they will have said sandwich who knows how many times…and it’ll stick.


Images from http://www.macmillanyounglearners.com/macmillanenglish/flashcards

February 17

Guided Visualisation – The Rock

Here’s an example of a guided visualisation using a close-up as a starting point. Remember when doing guided visualisations to speak slowly and calmly, grading language to your learners’ level. By grading language, we make the experience of the visualisation much more calming, as if faced with unknown or unclear language, students can become unfocussed. I also like to give further prompts to students after asking the initial question and these are in brackets below.

Look at this rock.
Now close your eyes.
Take a step back and look around you. Where are you? (Perhaps you’re in the mountains, or the countryside, or next to the sea)
What can you see around you?
What can you hear? (Perhaps there are birds above you, or insects flying around)
What can you smell? (Perhaps you can smell flowers, or the sea air)
Is anyone with you? (Perhaps you’re with family, or friends)
Imagine you’re taking your shoes and socks off. What can you feel beneath your feet? (Perhaps there’s grass or rocks or sand)
How do you feel?
When you’re ready, open your eyes and tell your partner what you saw.

At this point, you can monitor, helping with new vocabulary and collecting errors for whole group feedback afterwards.

August 25

Visual Literacy

End of Week 3 now and I’m very excited as this afternoon I’m doing the session on Visual Literacy.  Followers of the blog will have noticed I’ve been using more multimedia resources this year and this afternoon’s session is a very hands-on look at using video and photos in the classroom.

For the trainees attending the session, and for anyone else who’s interested, here are some useful links to sites and lesson plans using video and pictures:

• Ceri Jones has some great lesson plans on her blog close up

Lesson Stream, Jamie Keddie’s site, provides very detailed lesson plans based on short clips

• On this blog you can find a lesson plan on Planking and another on character builds taken from a screenshot

• Michelle Worgan has posted some great activities on her blog, including a lesson based on Free Running

eltpics gives teachers a place to share pictures on a variety of topics, all of which are available under a Creative Commons License.  If you’re interested in joining the venture, check out this post on Sandy Millin’s blog

English Attack is a great site where your students can learn English watching short video clips and music videos

• The onestopenglish article Teaching English Using Video also provides very detailed plans for teaching different levels and looks at the different activities you can do with video